How to build email marketing automations
To create an email campaign go to the Left Panel > Ecommerce Analytics > Email Marketing > Automations. Click the Add Automation button.
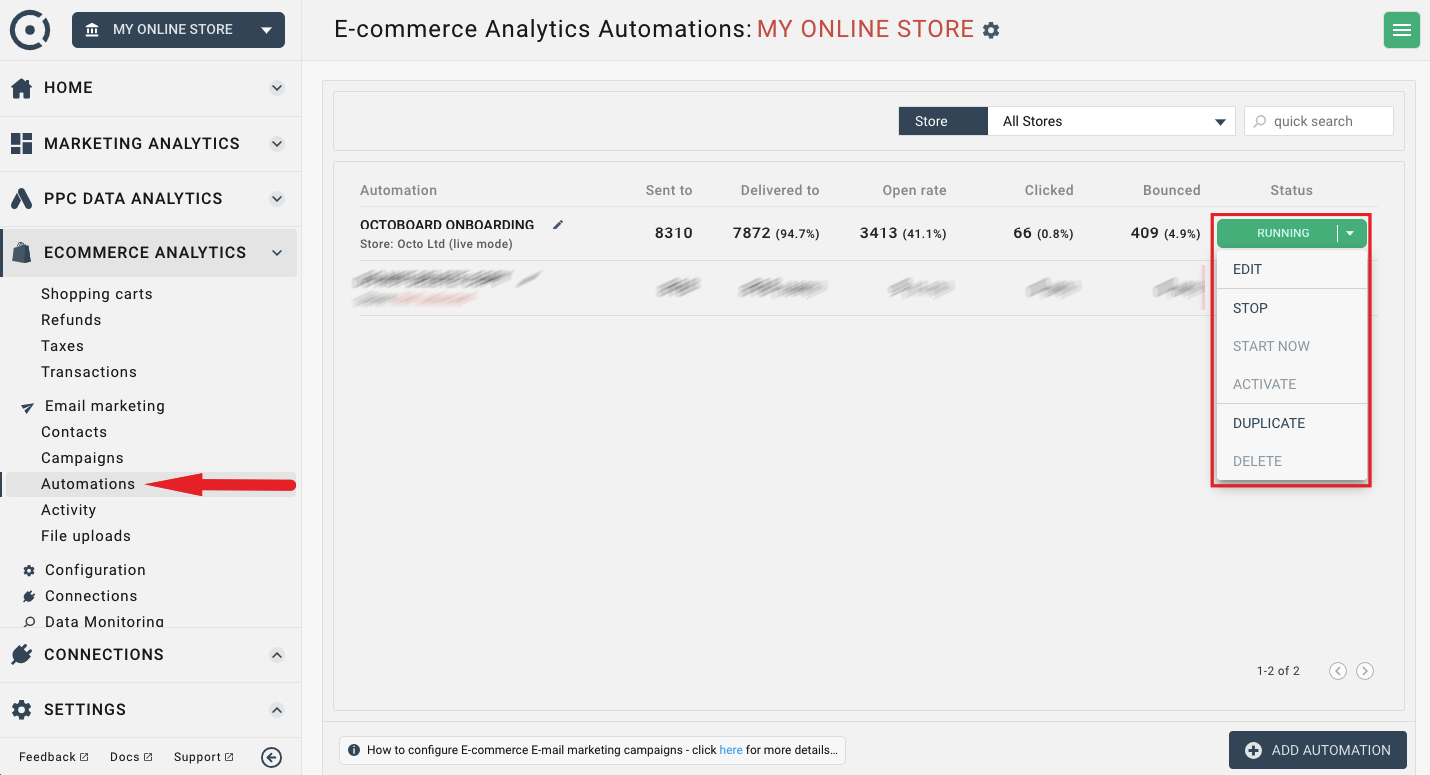
The automation will be created once you have defined it’s name, start/end date, selected the store you want to send the automation to and define actions (set of emails) of the automations.
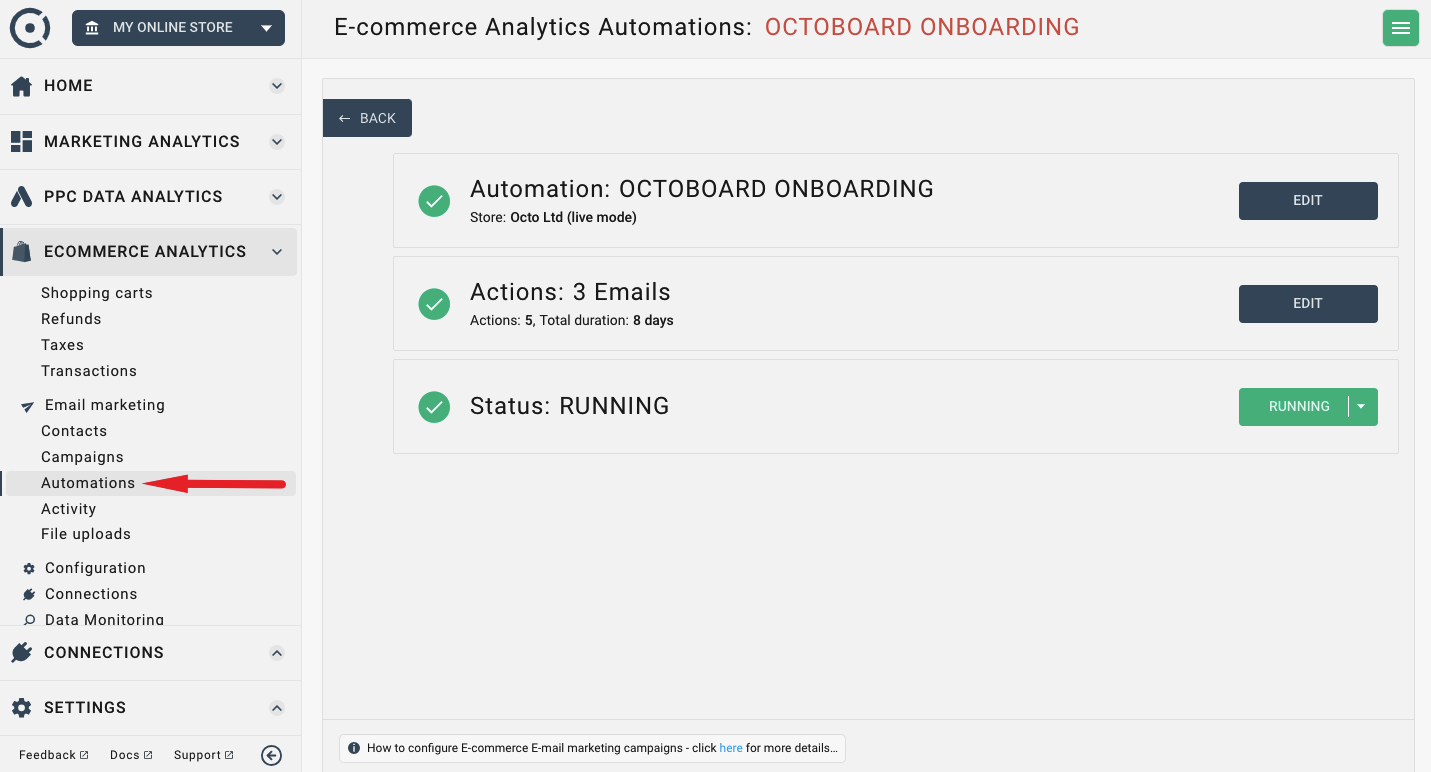
In the Automation Configuration panel you define automation name, store, the subset of contacts that you would like to send the automation to as well as the automation start and end date.
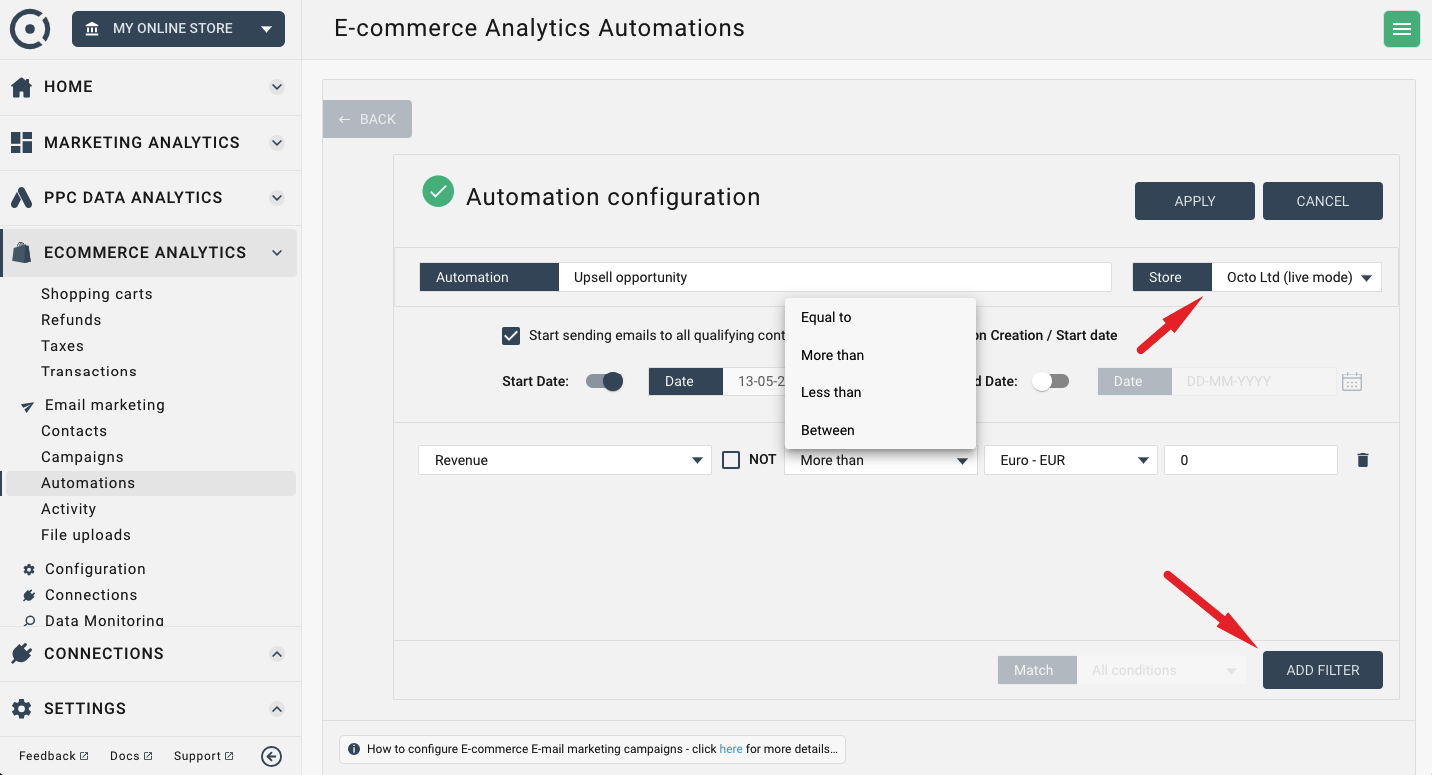
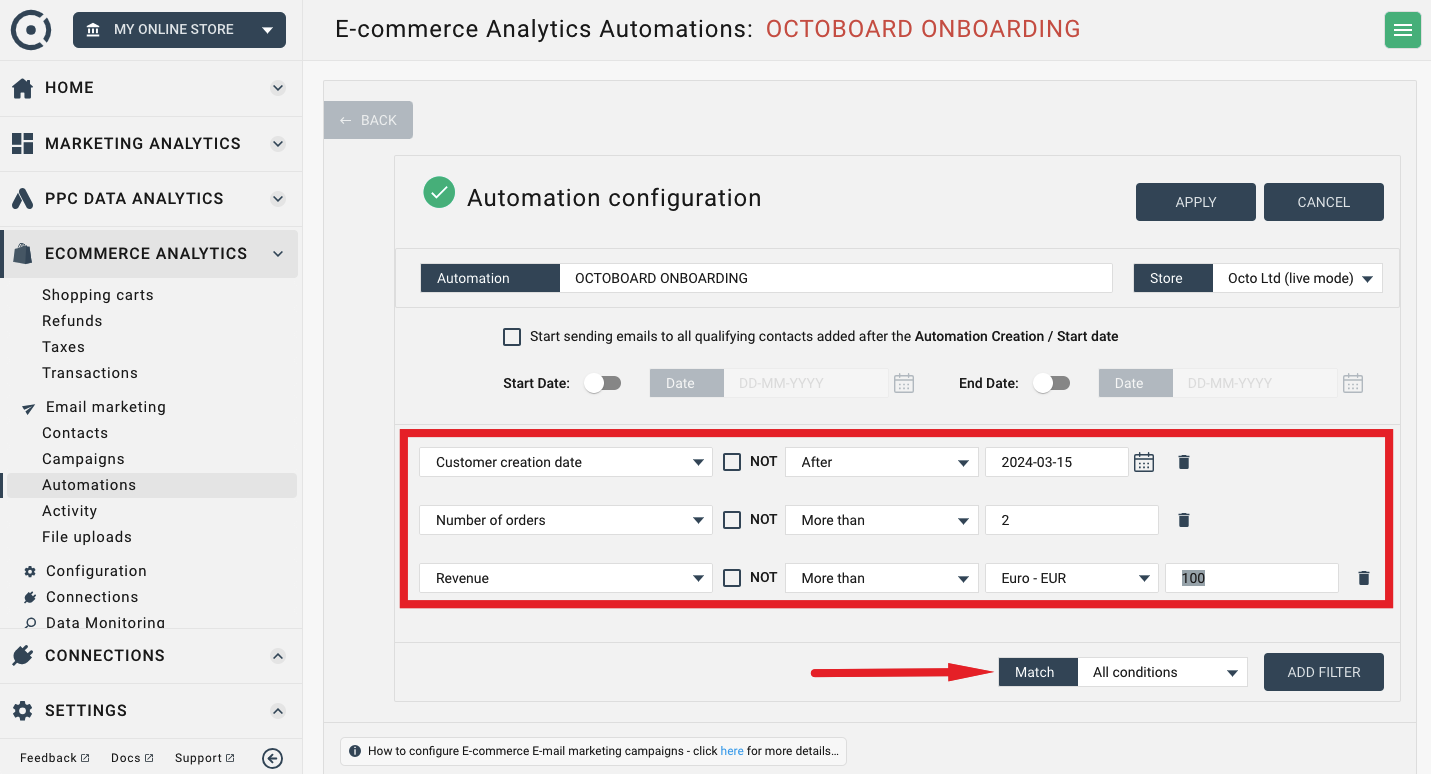
You can define contact filters using a number of available contact parameters. Only contacts that satisfy all of the conditions of the filter will receive automation emails.
In this case, you define an automation that will send emails to all contacts that have been added to the store after March 15th, have more than 2 orders and purchased over €100 worth of products.
Every automation should have one or more email messages that it sends to qualifying contacts. If your automation sends several emails, you need to make sure there is a wait of a day or more between each email.
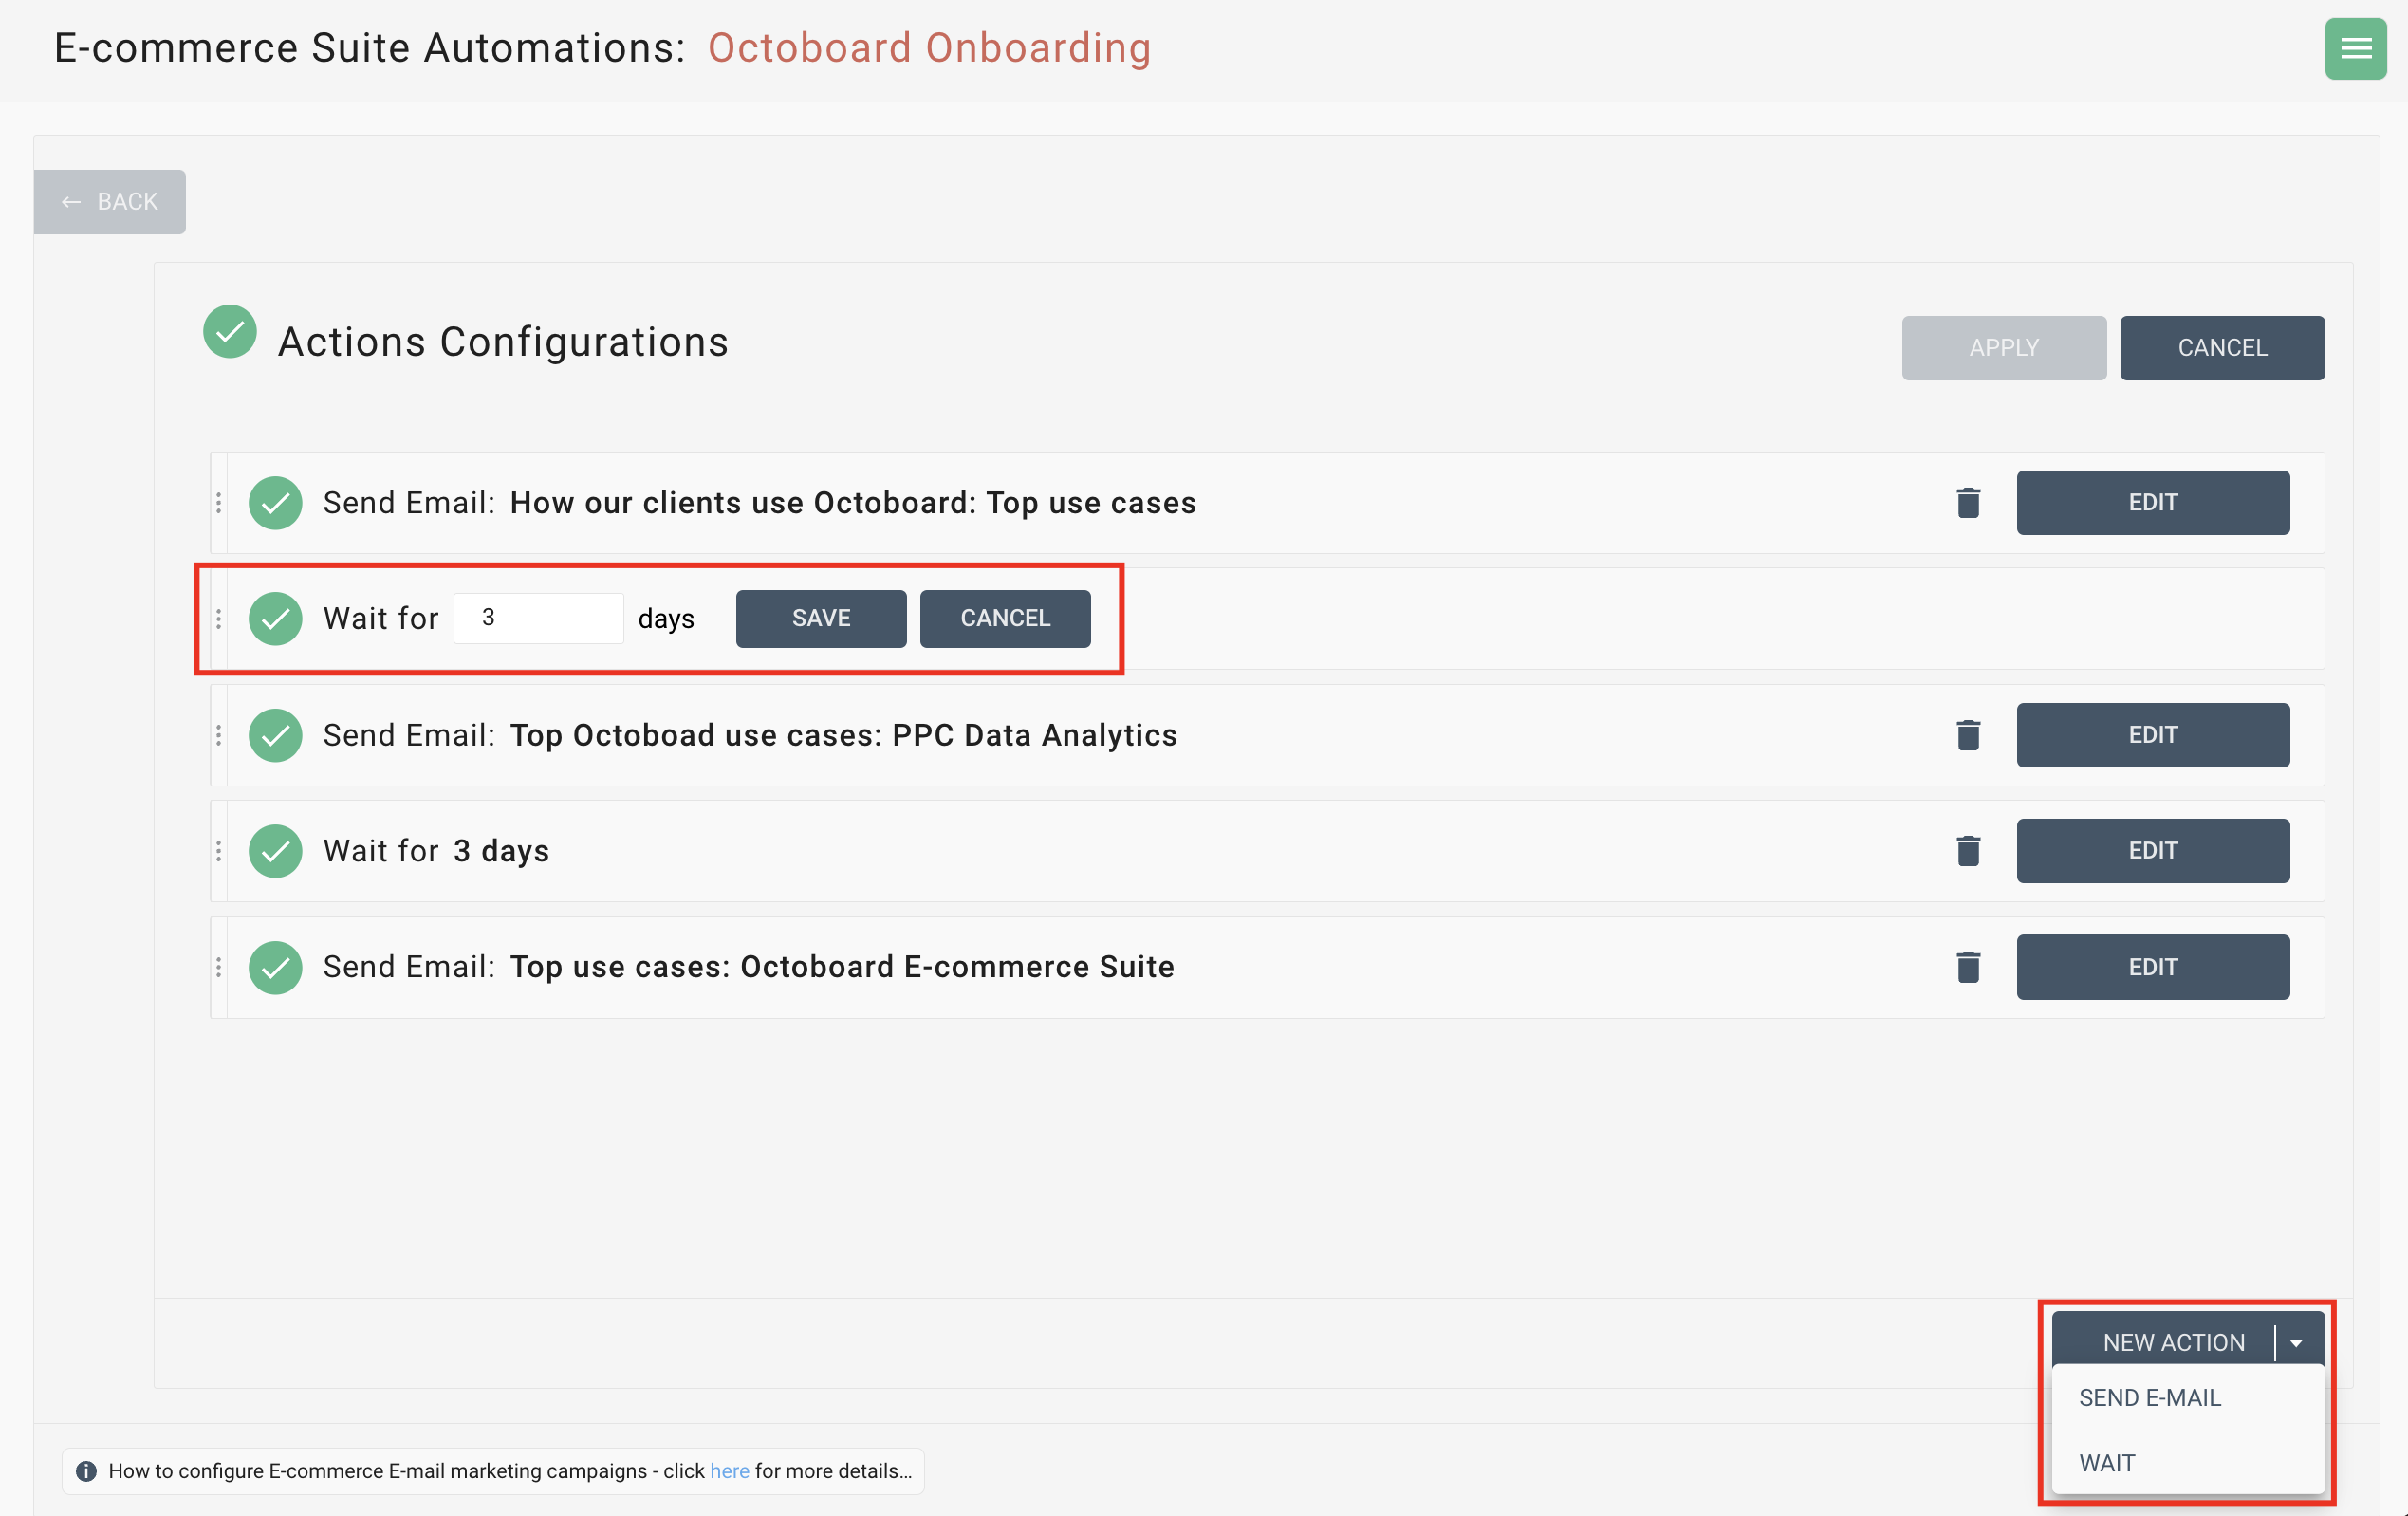
In this example, the automation sends 3 emails in 6 days.
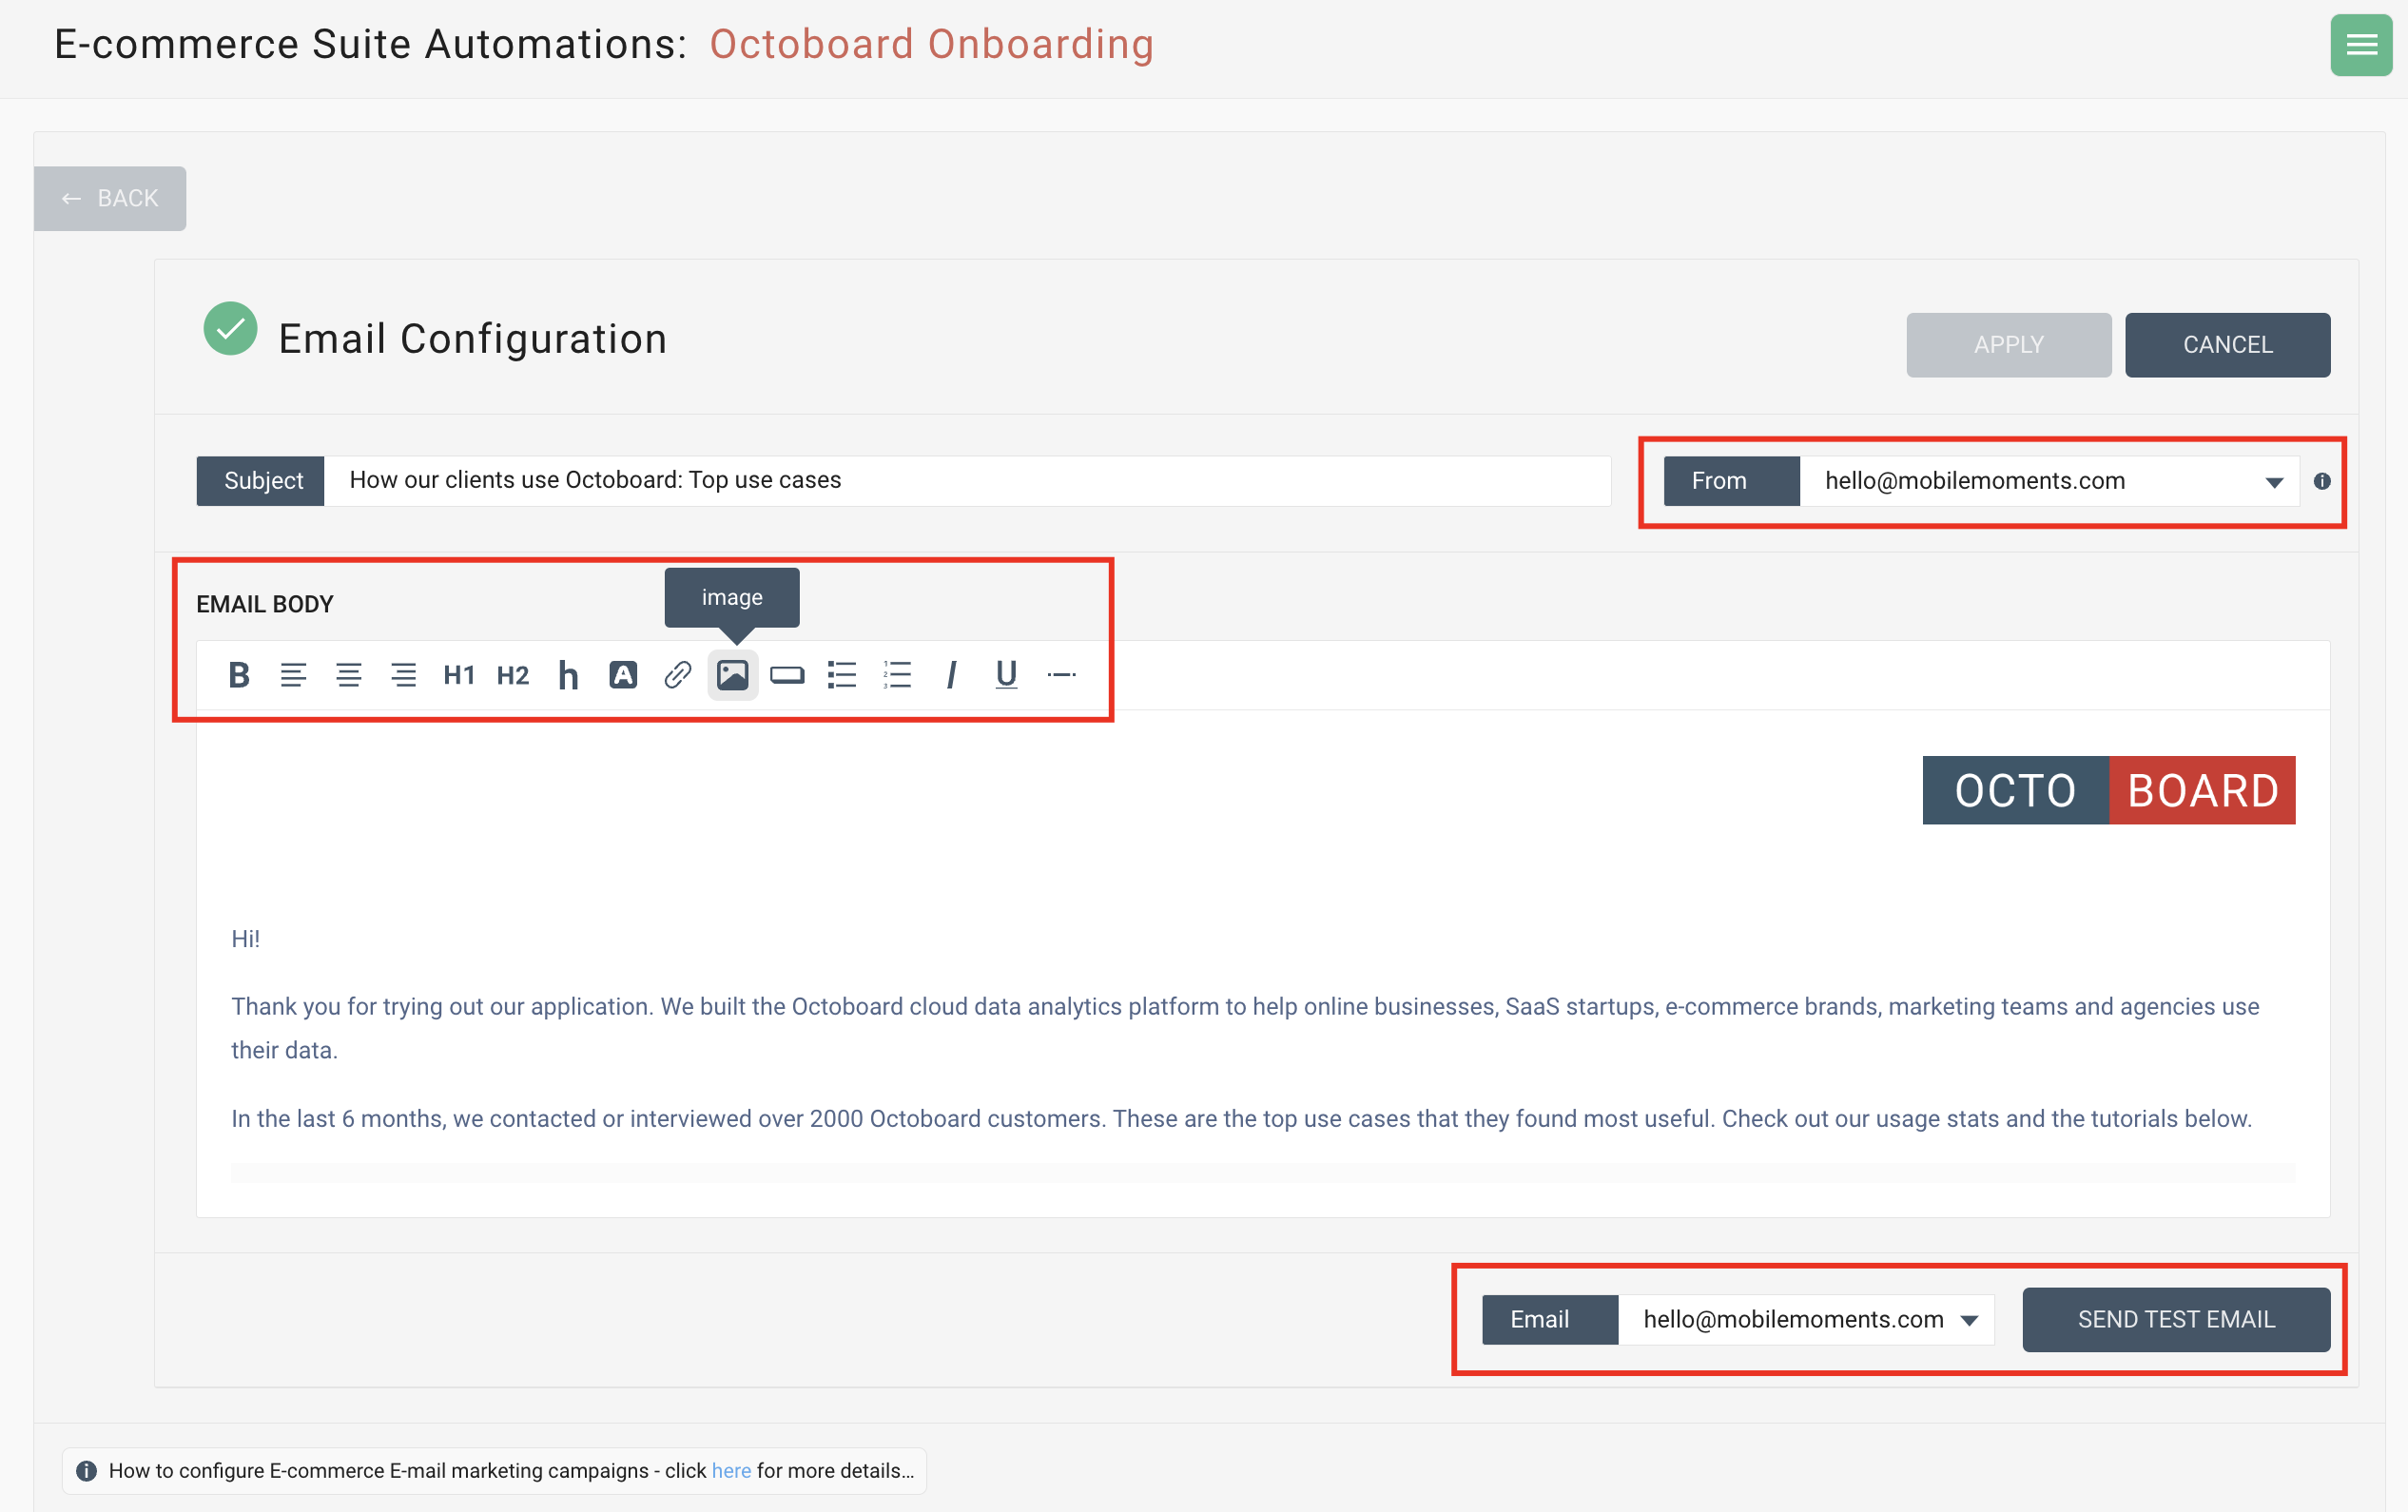
In this panel you can define the email text, add images, links, additional formatting, “From” email and send a test email to yourself.
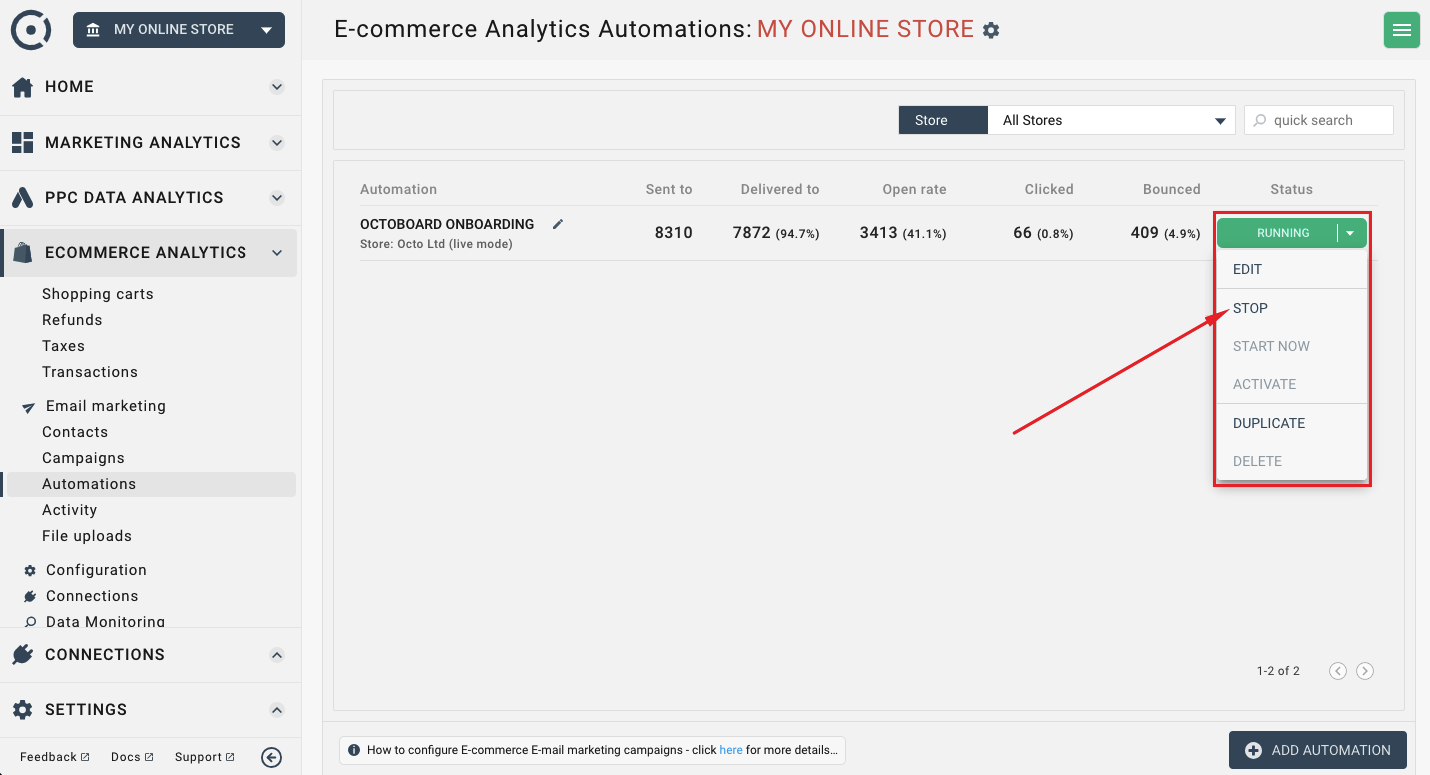
An automation can only be in either running or stopped state. You can start or stop any automation from the automation list interface.